Choosing the right rockbreaker boom system is one of the highest-leverage decisions you can make for productivity, safety, and total cost of ownership in mining, quarrying, and aggregate processing. Get it right and you’ll reduce downtime, prevent blockages from turning into full stoppages, and keep operators out of hazardous zones. Get it wrong and you’ll fight chronic under-reach, oversized breakers that overload structures, or poor coverage that leaves “dead spots” in the crusher mouth.
This guide focuses on the two selection variables that most directly determine performance: reach (coverage and geometry) and breaker size (impact energy and tool dimensions). We’ll also cover the practical constraints—mounting, duty cycle, automation, and serviceability—that should shape your final specification.
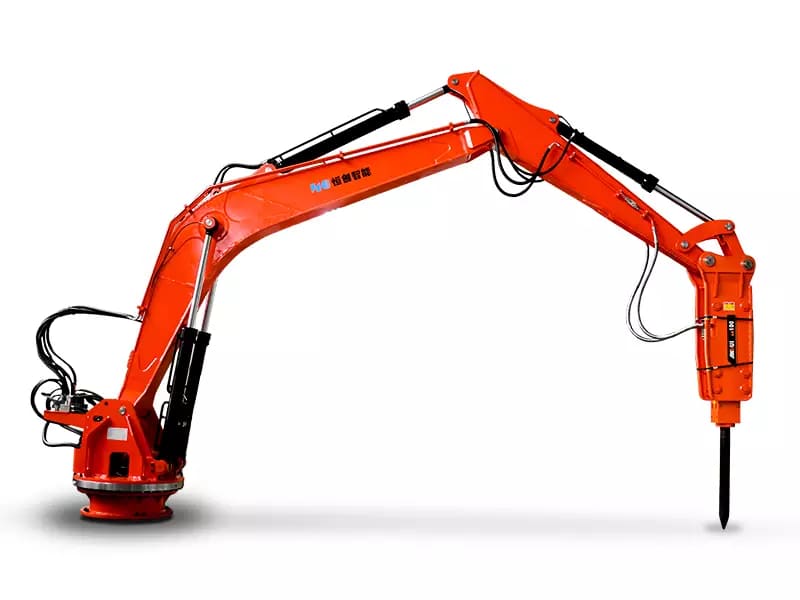
A rockbreaker boom system is a stationary mechanical boom paired with a hydraulic breaker (hammer) used to clear oversize rock and bridged material around crushers, grizzlies, hoppers, and transfer points. Instead of sending personnel with a bar or excavator into dangerous areas, you use a purpose-built system designed for repetitive, high-impact breaking and precise positioning.
Why sizing matters:
Reach defines coverage. If the boom can’t reach the full mouth, corners, and choke points, you’ll still need manual intervention or secondary equipment.
Breaker size defines breaking authority. A too-small breaker will “tickle” boulders, increasing hit count and cycle time. Too large, and you risk structural fatigue, mounting failures, and wasted energy.
The best rockbreaker boom system is not the biggest—it’s the one that matches your rock size distribution, crusher layout, and duty cycle.
When people say “reach,” they often mean maximum boom length. In practice, selection is about effective working envelope: can the tool point cover the areas where blockages actually occur, at usable angles, without the boom fighting the structure?
Before you look at brochures, sketch or measure:
Crusher opening dimensions (width, depth)
Hopper walls and any overhangs
Grizzly bars / spacing and elevation
Chutes and transfer points
Clearance to walls, catwalks, guards, conveyors
Mount location constraints (pedestal position, steel base, concrete plinth)
Then define your “must-reach” points:
Center of the crusher mouth (typical bridging zone)
Back wall (where wedging can build)
Left and right corners (dead spots)
Top lip / grizzly edge (hang-ups)
Chute throat if you’re clearing above a feeder
A well-selected rockbreaker boom system can hit all five with enough articulation to place the tool squarely.
Key geometric specs to evaluate:
Horizontal reach: how far the tool can extend over the mouth/chute.
Vertical reach (downreach): can the tool point travel deep enough into the hopper or crusher to attack lodged material?
Slew range: the rotation angle around the pedestal (often 360° or limited by hoses/guards).
Boom/stick articulation angles: determines whether you can approach boulders from above, from the side, and whether you can retract without collisions.
Rule of thumb: Prioritize a working envelope that covers your blockage zones at workable tool angles (not just maximum reach at a “fully stretched” pose you’ll never use).
Selecting a rockbreaker boom system with excessive reach can backfire:
Higher bending moments at the pedestal
Greater vibration transfer into mounting steel
Reduced stiffness (more “whip”), which wastes impact energy
More maintenance due to pin/bushing wear and hose fatigue
If you need occasional extra reach, it’s often better to optimize mounting position or pedestal height rather than jumping to a much larger boom.
The breaker is the business end of your rockbreaker boom system. Sizing is about delivering enough impact energy to break oversize material quickly, without overstressing the boom, pedestal, or base.
To choose breaker size responsibly, evaluate:
Typical oversize size (e.g., P80 oversize at the crusher)
Rock hardness/abrasiveness (compressive strength, silica content)
Frequency of bridging (occasional vs continuous duty)
Crusher type (jaw vs gyratory vs cone vs sizer; each has different choke/bridging behavior)
Feed method (dump pocket vs apron feeder vs grizzly)
Operating conditions (wet sticky ore, clay, freeze-thaw)
A breaker that’s perfect for an aggregate jaw crusher may be underpowered for hard, blocky ore in a primary gyratory pocket.
One common mistake is selecting a giant breaker because the system struggles to reach the right impact angle. That leads to:
Increased reaction forces and structural fatigue
Higher hydraulic demand (power pack or carrier)
Larger tool steel costs
More downtime from bushing/pin/line failures
Fix geometry first. Then size the breaker.
A rockbreaker boom system is engineered as a package: boom stiffness, cylinder sizing, slew bearing/pedestal capacity, and base anchoring all interact with breaker energy. If your breaker is too large for the boom class:
You’ll see cracks in mounting structures
Pins/bushings wear rapidly
Slew gearbox/bearing life drops
You may get poor control due to rebound and vibration
Ask suppliers for recommended breaker range for the boom model and insist on load case documentation for your duty cycle.
Think of selection as pairing a working envelope with a breaker energy window:
Priority: fast positioning + consistent coverage
Reach: moderate, optimized articulation to corners
Breaker: mid-range; high reliability and controllability
Why: cycle time is dominated by “move + hit + reposition,” not brute force
Priority: downreach + authority
Reach: strong vertical reach and stiff boom
Breaker: larger energy class, higher duty rating
Why: you need to reach deep and fracture boulders efficiently
Priority: slew coverage + collision avoidance
Reach: wide slew range with predictable envelope
Breaker: balanced size; avoid excessive reaction loads
Why: maneuverability matters more than maximum hammer size
This mental model helps keep the rockbreaker boom system appropriately matched to the real bottleneck.
Even a perfectly sized rockbreaker boom system will underperform if mounted poorly.
A higher pedestal can improve downreach and tool angle.
Too high can reduce stiffness and increase top-heavy vibration.
A pedestal offset from the mouth can create dead zones.
Best practice: choose a mount location that minimizes required reach while maximizing coverage. Sometimes moving the mount by a meter beats buying a larger system.
The base must absorb repeated shock loads. Ensure:
Proper steel thickness and gusseting
Adequate anchor bolts and embedment in concrete
Vibration management (where applicable)
Clear inspection access
If your supplier doesn’t ask for foundation drawings and load limits, treat that as a red flag.
Two rockbreaker boom systems with the same reach and breaker can behave very differently depending on hydraulics and duty rating.
Your breaker’s efficiency depends on stable hydraulic power. Undersized power packs cause:
Reduced impact frequency
Weak blows
Excess heat and oil degradation
Oversized power packs waste energy and increase cost. Specify based on breaker requirements plus control system needs.
Rockbreaking is harsh:
High heat from continuous impact
Dust and fines contaminating seals
Vibration loosening fittings
Look for filtration strategy, cooler sizing, and hose routing protection in the rockbreaker boom system design.
Modern rockbreaker boom systems increasingly integrate automation and remote operation features to reduce operator exposure and improve consistency.
Consider:
Remote controls (line-of-sight, camera-based)
Cameras and lighting for the crusher mouth
Interlocks with crusher operation (safety and coordination)
Auto-positioning or semi-automatic breaking routines (where available)
Guarding and exclusion zones designed into the platform
If your site has strict safety compliance or limited skilled operators, control sophistication can be as important as reach.
A rockbreaker boom system is a long-life asset, but only if it’s maintainable.
Check:
Pin/bushing replacement access
Standardized wear parts and tool steels
Hose routing and protection sleeves
Greasing points centralized or automated
Slew bearing and gearbox service intervals
Local parts availability and support responsiveness
A slightly more expensive system can be cheaper over five years if it saves even a few major shutdowns.
Use this process to narrow options quickly:
Define stations: crusher mouth, hopper, grizzly, chute.
Map must-reach points and required tool angles.
Choose mounting location (pedestal position and height) to minimize overreach.
Estimate oversize characteristics (size + hardness + frequency).
Select boom class that provides coverage with stiffness.
Select breaker size within boom’s recommended range for your rock and duty.
Validate hydraulics (flow, pressure, cooling, filtration).
Confirm structural design (foundation, base steel, anchoring).
Specify controls and safety (remote operation, cameras, interlocks).
Evaluate service model (parts, maintenance access, warranty, support).
This prevents the two classic mistakes: buying on maximum reach alone, or buying on breaker size alone.
A rockbreaker boom system has “enough” reach when the tool point can cover all blockage-prone zones—center, back wall, corners, lip/grizzly edge, and any chute throat—at workable angles without collisions. Maximum length is less important than the effective working envelope defined by articulation and mounting position.
Not always. A larger breaker can increase reaction loads, accelerate wear, and require a heavier boom and stronger foundation. The best approach is to optimize reach and tool angle first, then select a breaker size that matches your rock hardness, oversize size distribution, and duty cycle within the boom’s rated range.
Common downtime drivers are structural fatigue from oversizing, poor hose routing and protection, insufficient hydraulic cooling/filtration, and wear part neglect (pins, bushings, tool steels). A well-specified system with serviceable layout and correct breaker pairing typically delivers the best uptime.